Control AutoPlay Options in Windows 10
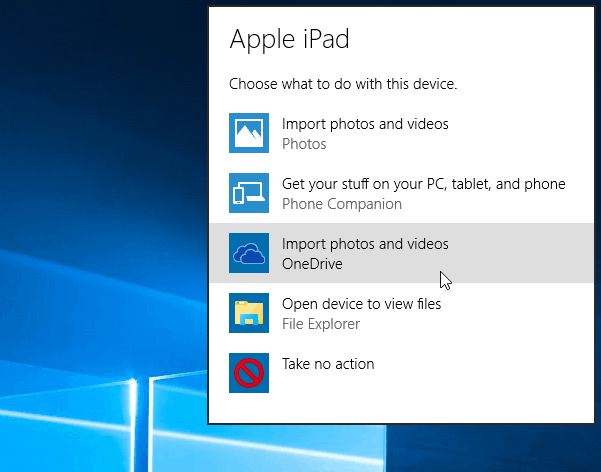
Like previous versions of Windows, when you plug in a device, i.e., SD card, phone, or tablet, then an AutoPlay menu appears and asks how you want Windows to handle the device. If you don’t like this popping up all the time, you can either disable it or set each device to do what you want every time it’s connected.
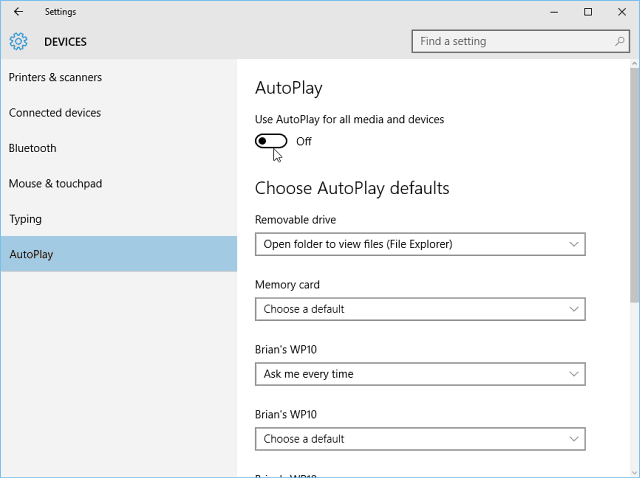
Here you have several options that let you choose what happens when you plug in your devices. But first, if you want to turn AutoPlay off, then flip the switch at the top to Off.
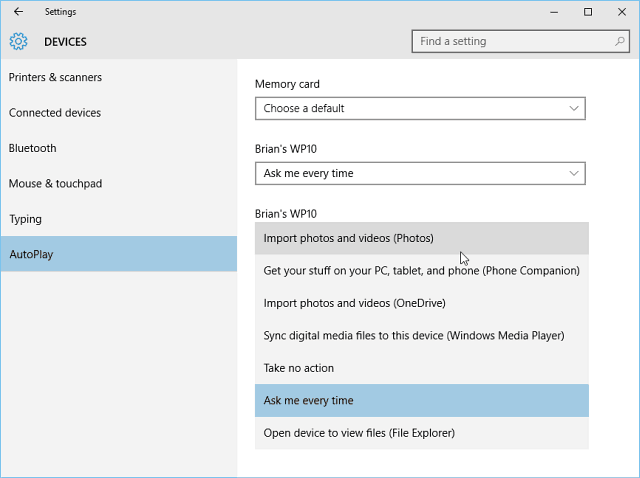
To manage what Windows 10 does with each device when you plug it in, select what you want to do with each of your listed devices. As you can see in the example below, when I select my Windows Phone, there are several different actions that I can choose. I can import photos and videos from the phone to my local drive or OneDrive, take no action, open the content to see in File Explorer, etc. Choose the option that works out best for you.
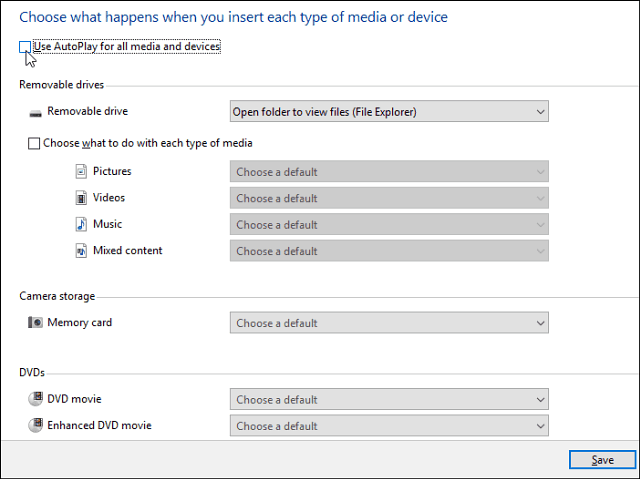
It’s also worth noting that you can still get to the traditional Control Panel version. That will allow you to set what happens for media types as well as devices. It, of course, also lets you turn off AutoPlay completely. To launch it, type: autoplay into the search box and hit Enter. There you have the Control Panel version, with options that might be more familiar if you’re just getting started with Windows 10 after upgrading from Windows 7.
If you’re not running Windows 10 yet, you can turn off AutoPlay in Windows 8, too. Comment Name * Email *
Δ Save my name and email and send me emails as new comments are made to this post.
![]()
