Note: This was written using Word 2016 but the instructions should be similar on modern versions of Word in Microsoft 365 (formerly O365).
Using the Mail Merge Feature in Microsoft Word
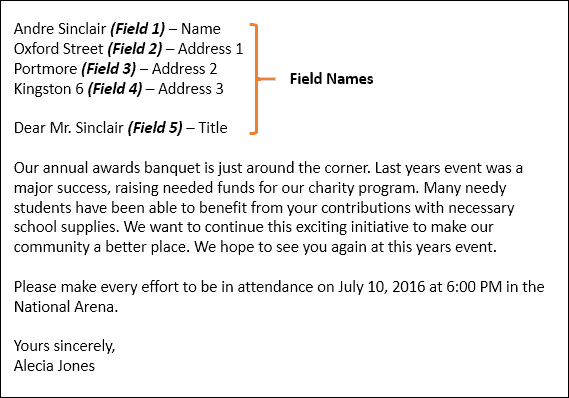
For this example, I will create a document inviting friends to an event. There are two components to a mail merge letter; the main document and the data source, such as the names and addresses of the individuals invited to the event. Once you have gathered the information for the data source, Word will handle combining the documents for each guest. The first step is to have all the unique information for each recipient called a Field Name, such as the name, address, and salutation. Another important part of creating a mail merge document is the Form, which contains information delivered to the recipient. The sample letter below contains five fields I will need to include in each document.
Start Mail Merge Wizard
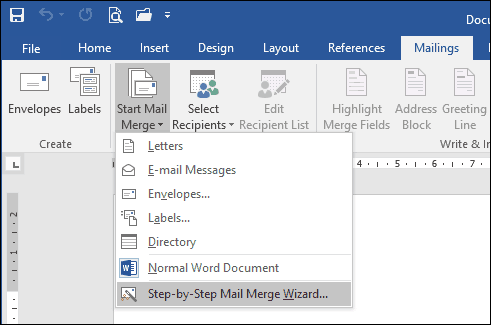
Create a new blank document in Microsoft Word and select the Mailings tab > Start Mail Merge > Step-by-Step Mail Merge Wizard.
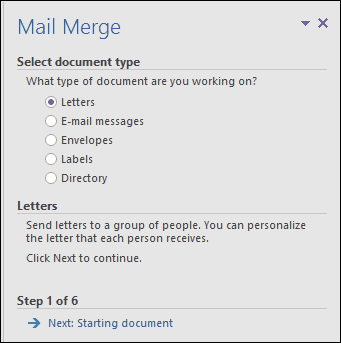
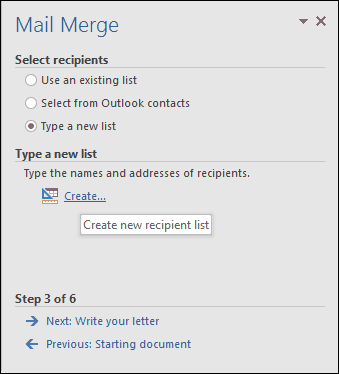
When the Mail Merge wizard comes up, choose the Letters radio box and then click Next: Starting document.
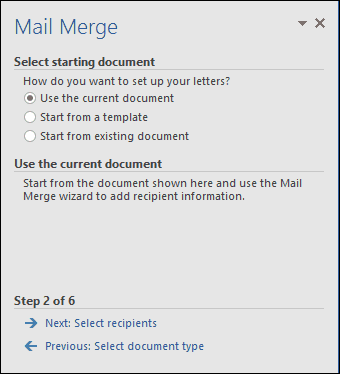
Select Use the current document and then continue to the next step to select recipients. The Mail Merge wizard gives you the choice of using an existing document. If I already had a letter prepared, I could modify the field names as the basis for the data source.
The Mail Merge wizard is powerful. You can use multiple sources for your recipient list, including a Microsoft Access Database or Excel Spreadsheet. For this article, I will create my data source from scratch by selecting, Type a new list and then click Create.
Create and Save the Data Source
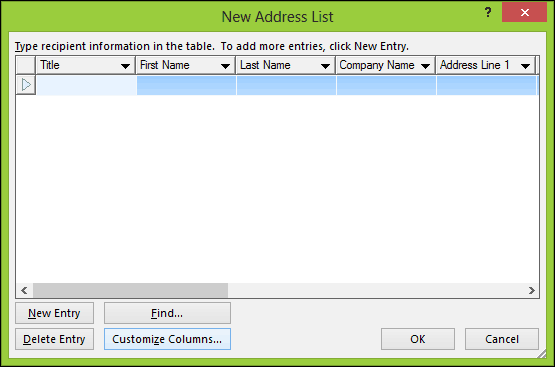
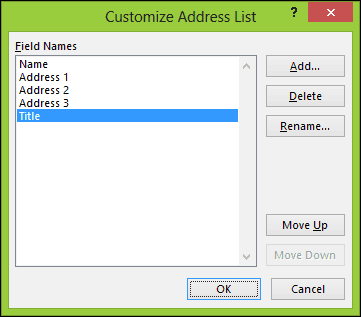
A form with pre-populated fields will be presented. This might not be ideal since we might not want some of these areas, which might confuse us. So we will delete and modify some of the field names; click the Customize Columns button to do so.
If you go back to our sample document, you will notice we only had five fields, while the pre-populated fields provided by Word total 13. Some of them are important, so we will keep just the ones we want. To delete a field, select it, then click Delete.
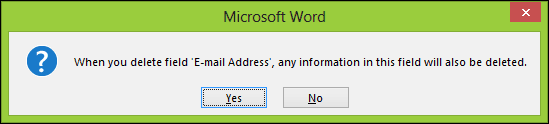
Click Yes to confirm the deletion. Repeat this step for all the sections you don’t want.
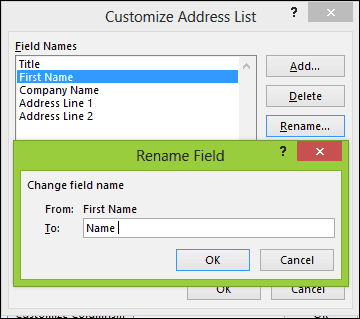
Because we don’t have some specific fields needed, we will have to rename existing fields and add new ones.
Once complete, the list of field names should match and amount to the same as described in our sample document. Click OK to confirm the changes.
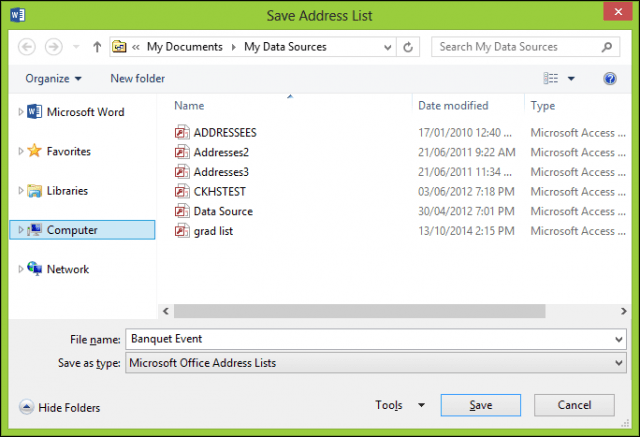
Proceed to populate the fields with the names and addresses of each recipient; when complete, click OK.
Save your data source, which will merge into your final document.
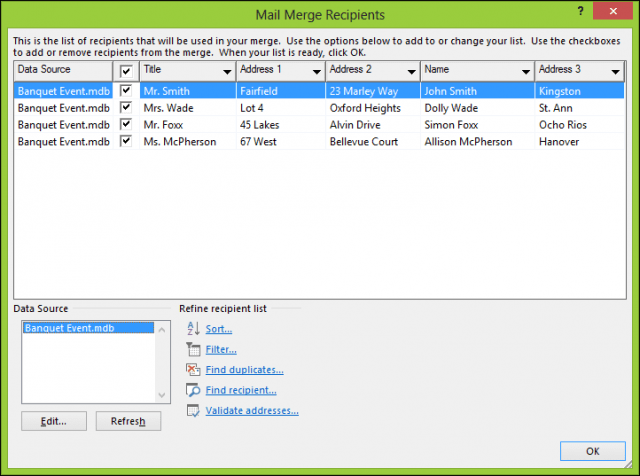
A preview of your Mail Merge Recipients will be presented. If you want to make changes such as edit or add a field, select the Data Source, then click Edit. Proceed to write your letter, then enter merge fields where necessary.
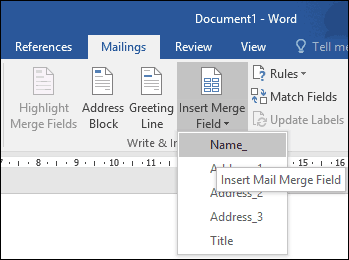
Insert Merge Fields
To insert a merge field, select the Mailings tab, click Insert Merge Field, then choose your merge field. Repeat the steps to populate your document with the appropriate merge fields.
When complete, save your letter; this will be called the Form Letter. If you know, you might use a document with a similar structure, and you can choose the option to reuse it in an existing document during the Mail Merge wizard.
Merge Final Document
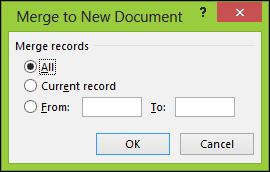
Here comes the fun part, merging your document. Select the Mailings tab, then click Finish & Merge button, then click Edit Individual Documents.
Select All then click OK.
That’s it. Now all of your documents are ready to print or review.
These instructions also work in Microsoft Word 2013, 2010, and 2007. If you produce documents such as certificates, the Mail Merge functions also work in Office applications such as Microsoft Publisher. For more tips and tricks for using Microsoft Office, check out the following articles, or browse our complete archive of Office articles.
How to Activate and Use Inking in Word 2016 How to Track Changes in Word 2016 Documents Improve Your Productivity with Tabs in Microsoft Word
Comment Name * Email *
Δ Save my name and email and send me emails as new comments are made to this post.


![]()
