We’ve shown you how to create a bootable USB drive with Rufus, but another easy method is to use the Media Creation Tool from Microsoft. The Media Creation Tool allows you to perform an in-place upgrade where you keep all of your files and settings. It also lets you boot from the drive and do a clean installation. Here’s how to create a bootable Windows 11 USB drive and install Windows 11. Note: This requires a USB drive that’s 8 GB or larger. Make sure to back up any data you need on the drive first. Before upgrading a Windows 10 PC, make sure all apps are closed and back up your system.
Creating a Bootable Windows USB Drive Using the Media Creation Tool
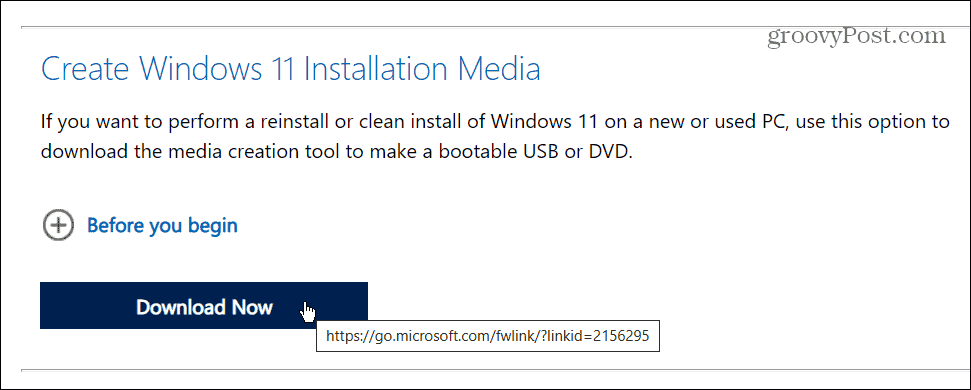
If you want to use the Media Creation Tool to create a bootable USB installation drive for Windows 11, you’ll need to follow these steps. To begin, head to the Windows 11 download page and press the “Download Now” button in the Create Windows 11 Installation Media section.
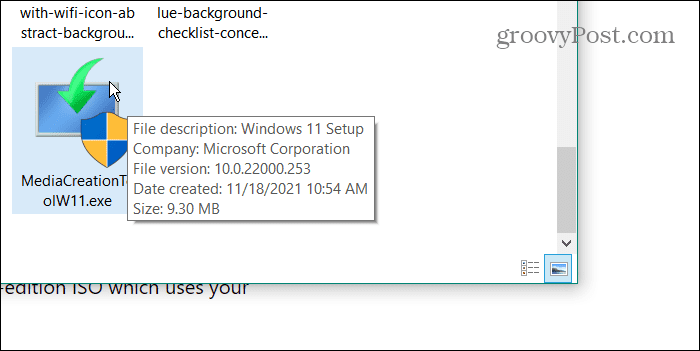
Allow the download to complete, then launch the MediaCreationToolW11.exe file from your downloads folder.
You’ll need to follow some straightforward on-screen instructions next. First, click Accept when the EULA comes up, then choose your language—you can also change the language later. To change any of the recommended installation settings, clear the Use the recommended options for this PC checkbox, then click Next.
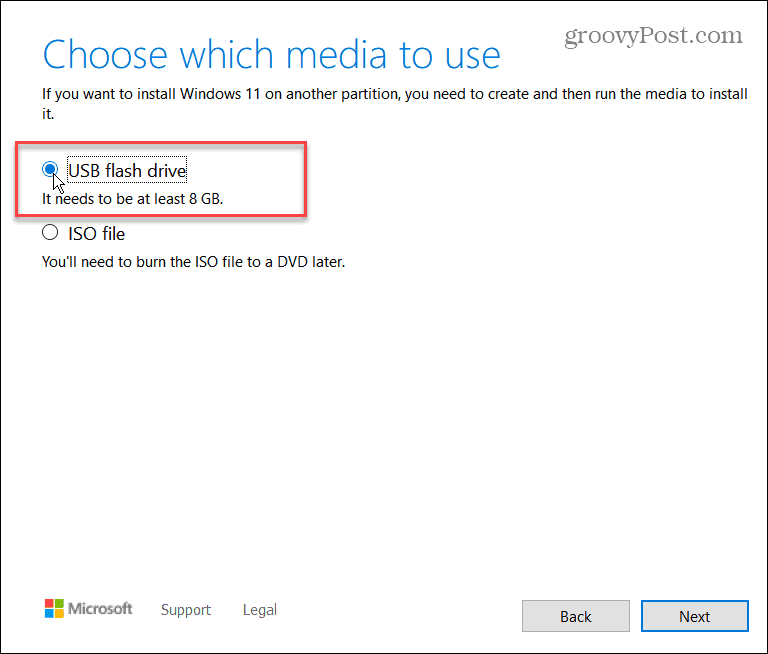
Make sure to select “USB Flash Drive” at the next stage, then click Next.
You’ll need to select the USB drive you want to use as your bootable drive. To do this, select the right drive in the Select a USB flash drive screen, then press Next. If you don’t see the correct drive, make sure it’s plugged in, then press “Refresh Drive List.” Any drive you choose will be formatted, so make sure you back up any files first.
The Windows 11 installation files will download—wait for this to complete. The amount of time it takes will vary, depending on the speed of your internet connection.
After the download completes, the wizard will begin creating your Windows 11 bootable USB drive.
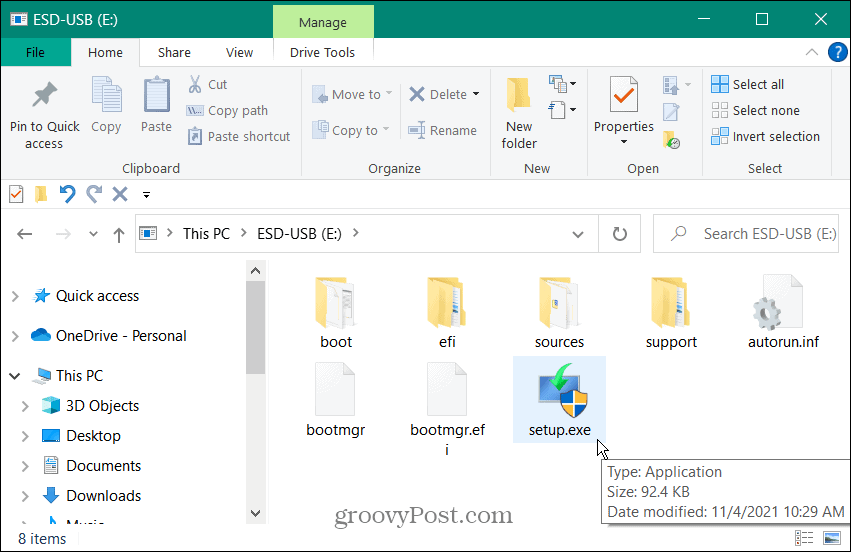
When it’s complete, you’ll get a “Your USB flash drive is ready” message. Click Finish to end the process. You can also click the drive letter—the contents of the drive will open in File Explorer. You should find the installation files shown in the shot below.
How to Install Windows 11 from a USB Drive
With the USB drive created, you can then install Windows 11 using it. Note: Before starting the Windows 11 installation, make sure to back up your system and close all apps. Plug the USB drive into an open port on the PC you’re upgrading first. For an in-place upgrade (allowing you to keep all files and settings), click on the Setup.exe file.
You’ll need to agree to the EULA and follow any additional on-screen instructions. Note that you’ll be able to choose when to install any available updates and drivers. If you install Windows 11 on unsupported hardware, you might want to check the “Not right now” option. You can always manually check for updates later.
When you reach the “Ready to Install” screen, click “Change what to keep” to confirm what files and settings you want to keep (and what settings and files you want to delete). If everything looks good, click the Install button.
Wait for Windows 11 to install on your Windows 10 PC. The time it takes will vary, so take a break while this happens. Your PC will restart a few times during the process.
How to Boot From a Windows 11 USB Drive
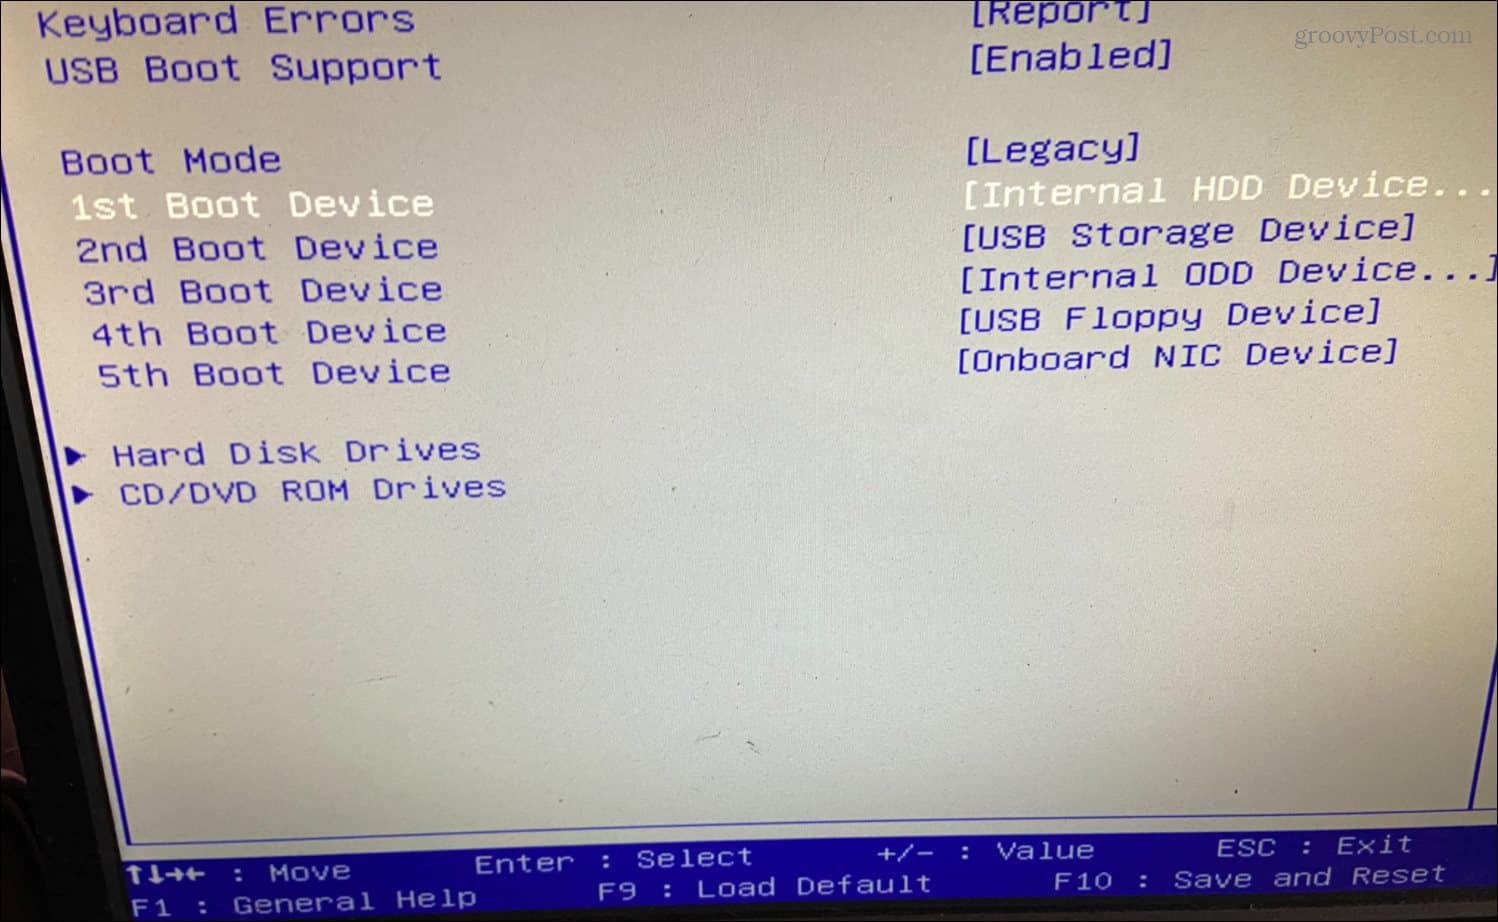
You can also start fresh and perform a clean installation of Windows 11 using your USB drive. Make sure to enter your PC’s BIOS/UEFI settings and change the “Boot Order” to USB to do this. Creating the USB drive with the Media Creation Tool makes it “EUFI ready,” so you shouldn’t have problems with Secure Boot blocking your drive. If you aren’t sure how to enter the BIOS/UEFI settings menu, check the PC manufacturer’s support documentation.
Changing your PC’s boot order to give your USB drive priority should allow the Windows 11 installer to appear. When the install wizard starts, follow any on-screen instructions—it’s a straightforward process and shouldn’t take too long to complete.
Using a USB Installation Drive for Windows 11 PCs
If you’re worried about your PC, keep a USB drive ready with the latest Windows 11 installation files. You can then install Windows 11 using a USB drive at any time—the same drive will work on multiple PCs. If the drive was created recently, you can also use the files to upgrade PCs that you keep offline. If you don’t plan on installing Windows 11 again for a while, you may want to create a USB recovery drive instead. This will allow you to recover your PC if anything goes wrong. If you’re new to Windows 11, don’t forget to learn some easy and time-saving keyboard shortcuts next. Comment Name * Email *
Δ Save my name and email and send me emails as new comments are made to this post.


![]()
