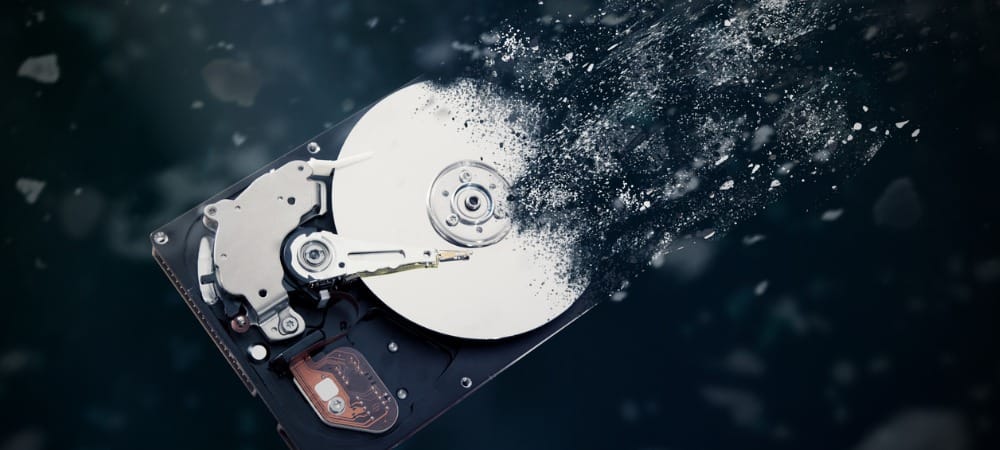
Does your computer need more storage space? Did your hard disk drive (HDD) die? Or are you just looking to upgrade your system to a Solid State Drive (SSD) and use your old drive as a pack mule? Whatever the case may be, the task of installing and moving around storage disk drives is easy after going through it once. And the good news is it’s relatively the same for all computers. Below I’ll show you the ropes.
The Hardware Install
What you’ll need:
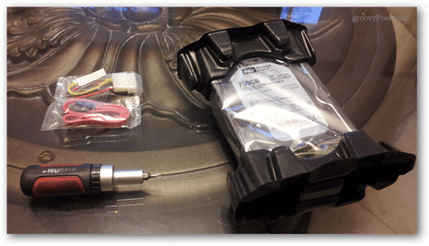
A new/extra HDD / SSDScrewdriverA static-free work area (static shock is bad for computers).Mounting screws (Very tiny machine screws)SATA CableYou can re-use an old one, but if it’s probably a good idea to get a new one. They are cheap!(?) SATA power cable adapterYou’ll only need this if your power supply doesn’t have any open SATA slots.(?) Available SATA slots on the motherboardYou’ll only need this if adding an additional hard drive. For replacements, just use the same slot the old drive was connected to. If you’re not sure how many your motherboard has, you may want to Google the model # of it and read the specs sheet.(Recommended) Compressed AirNow is the perfect time to clean the dust out of your computer. I recommend waiting to blow dust out until you’ve removed all existing HDDs from the computer.
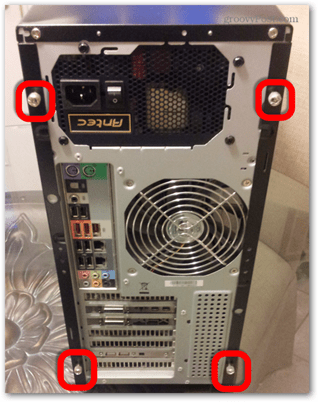
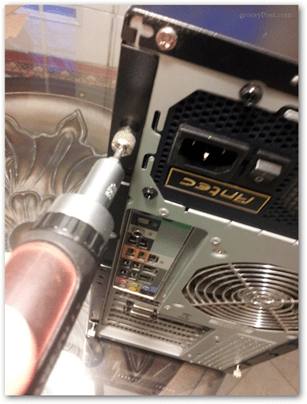
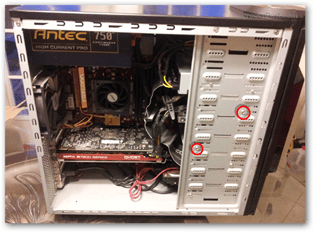
The first thing to do is make the computer accessible. Flick off the power supply switch and then unplug the power cord and everything else. You need to remove the sides of the desktop case. 9/10 times this is done at the rear of the tower. On a typical box, there are 4-6 screws overall that hold both side panels in. You want to remove all of these. Depending on the type of screw, you may or may not need a screwdriver.
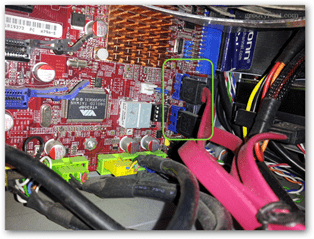
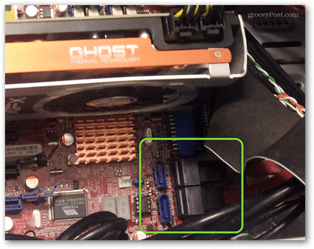
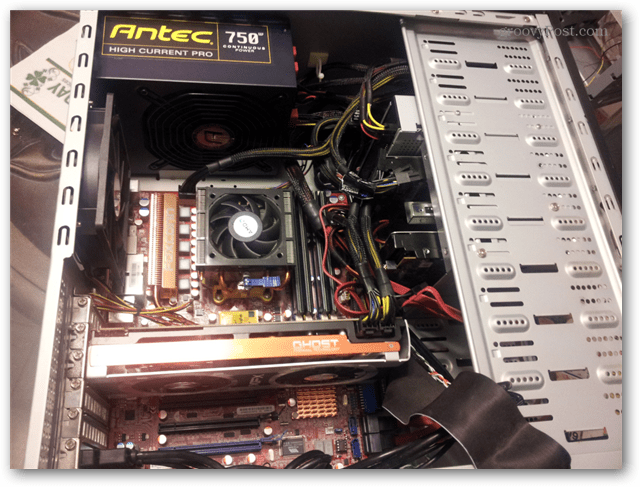
Now with the sides of the case open, the first thing to do is locate your SATA ports. Usually, these are easy to spot just by looking for the bright red SATA cables that are plugged into them. On the computer I’m working on in the pictures, the motherboard specs sheet on this computer told me it had 6 ports. The first two were easy to find, but only after moving and removing a few cords was I able to see the remaining 4 ports which orientated in an interesting sideways layout. Also, if you unplug anything while doing this, be sure to remember where it goes!
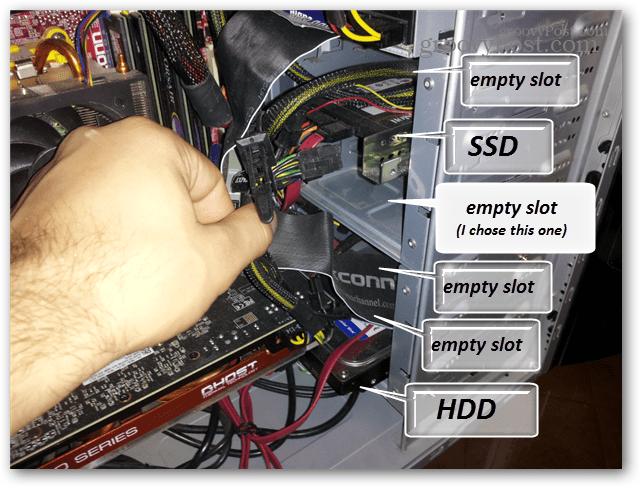
Now it’s time for us to find where the new disk drive will mount. If you’re replacing an old drive, it will be obvious to just put it in the exact same spot. However, for a new drive, there are probably a few options. In this computer, I decided to put it below the already installed SSD.
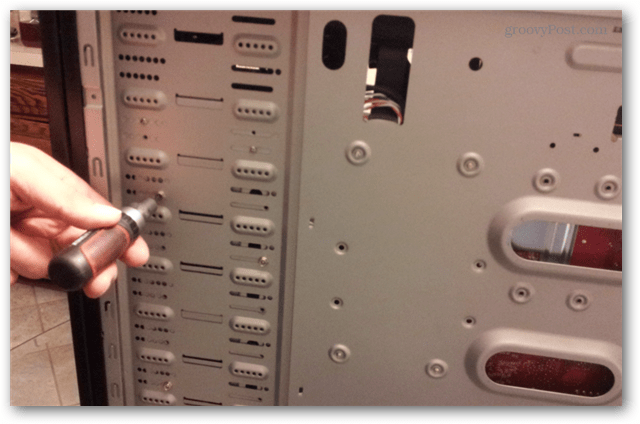
In a typical case, the mounting is done by sliding the drive into the slot and then screwing it directly into the holes in the case. Although, the case I’m working with today is not that typical, as you’ll see in just a minute.
Screws are also located on the opposite side of the case and should be mounted in at least 4 of the screw holes on the sides of the HDD.
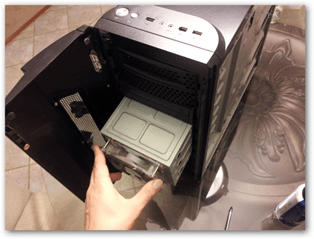
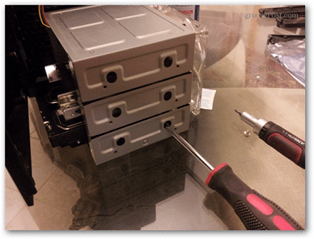
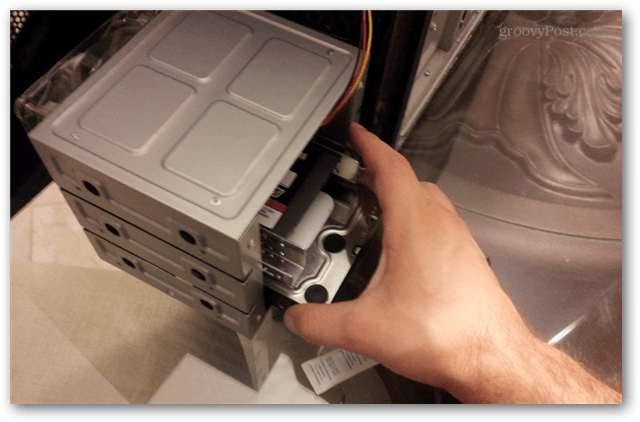
Interestingly, the case I was working with today ended up having drive bay racks inside of it. This meant that I had to remove the rack and install the new disk drive while outside the computer. So at this point, all of the existing HDDs are out of the computer, and it’s ready for an install.
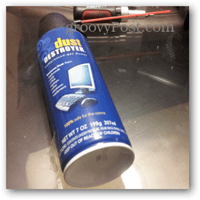
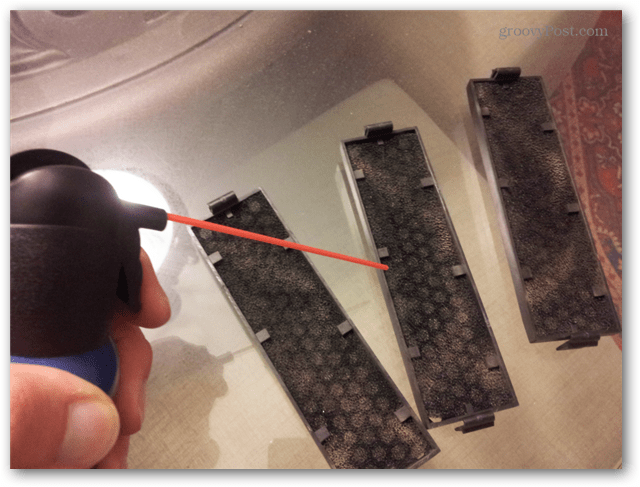
Now is the time to dust out the case. The first things I like to clean are any fan filters; you can thoroughly blow them out with the compressed air. Also, the inside of the case and the actual fans most likely need to be dusted. Pretty much everything needs to be cleaned out with the compressed air. If you rinse the filters, be sure that you don’t use water anywhere near the inside of the case.
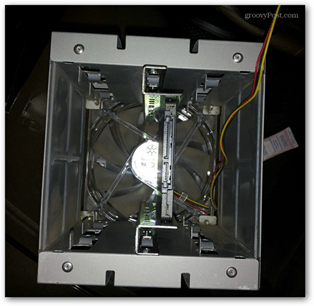
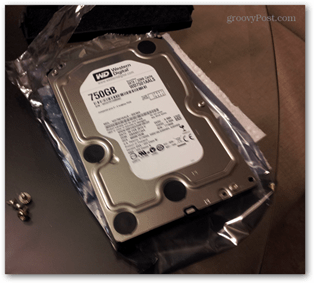
Now that the computer is all cleaned out. Time to install the new drive. In the picture below is a 750GB HDD. As far as orientation goes, you could put it upside down, sideways, or whatever way you want. The normal way of doing it is either sideways or with the circuit board down, just to help deter dust from building up near cracks that lead to the drive’s internal components. In this case, I mounted the drive in the removable drive bay. I also had to improvise and grab a longer screwdriver as my stubby ratchet couldn’t reach. When installing the screws, you want to make sure they are tight but not overly tight to the point they are straining the drive/case or stripping out the threads.
A good way to check if it’s tight enough is to try to gently try to jiggle the drive with your hand. If it doesn’t move at all, you’re good. Vibration is really bad for a drive, so you want to be sure it’s in there solid.
Now just put everything back in, connect the cables, and you’re ready for a test run. Make sure that there isn’t anything pressing up against the SATA cords and that they are completely plugged into both the motherboard and the drive(s). Figuring out how the SATA power and data cables plugin is really easy is only one way they will fit! I suggest that before putting the side panels back on the case that you make sure everything works. Now just put the computer back in its normal spot at the desk and plug the power, keyboard, monitor, and anything else back in.
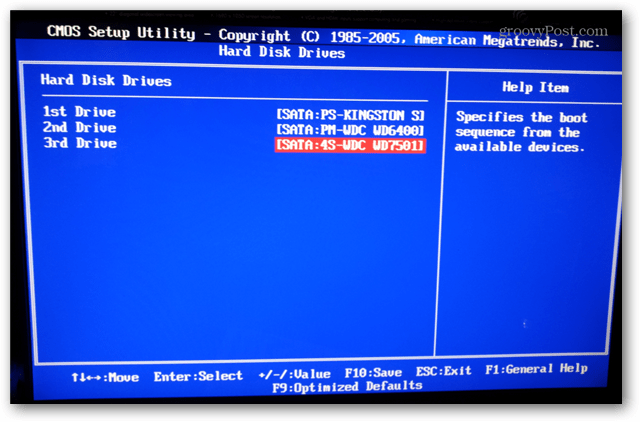
You could boot the computer up into Windows, but it’s faster to just check the drive from the BIOS. Press the power button and before it begins to boot up, press the F2 or DEL key to go into the BIOS. Once inside, there should be an option for something along with the lives of Drives, Storage, or Disks. In the bios pictured, the option was called Hard Disk Drives and found under Advanced Bios Options. Suppose you see the name of the drive showing up in the bios, congrats! This means that the computer recognizes the drive and is plugged in properly.
Install Software
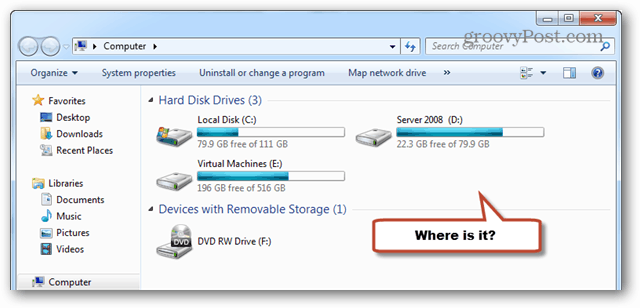
At this point, what you do next depends on whether you’re replacing an old operating system drive or just adding a new additional one. If you boot up your PC after installing a drive fresh from the manufacturer, chances are it won’t show up as a Hard Disk Drive in the Windows Explorer file browser. That’s because it needs to be partitioned.
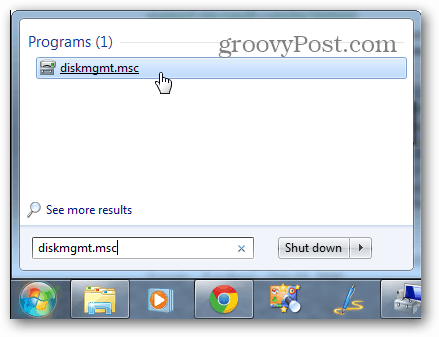
To start the process, open up Windows built-in Partition Manager. This can be done by typing in “diskmgmt.msc” into the search box. (Works the same in Win8 search).
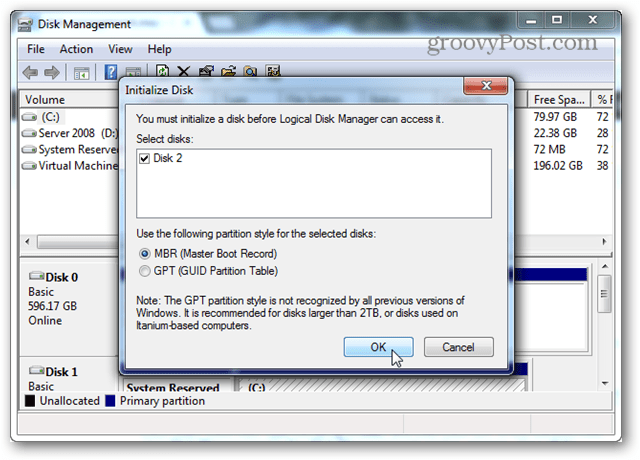
Immediately a pop-up should appear titled “Initialize Disk.” Select the MBR format and click OK.
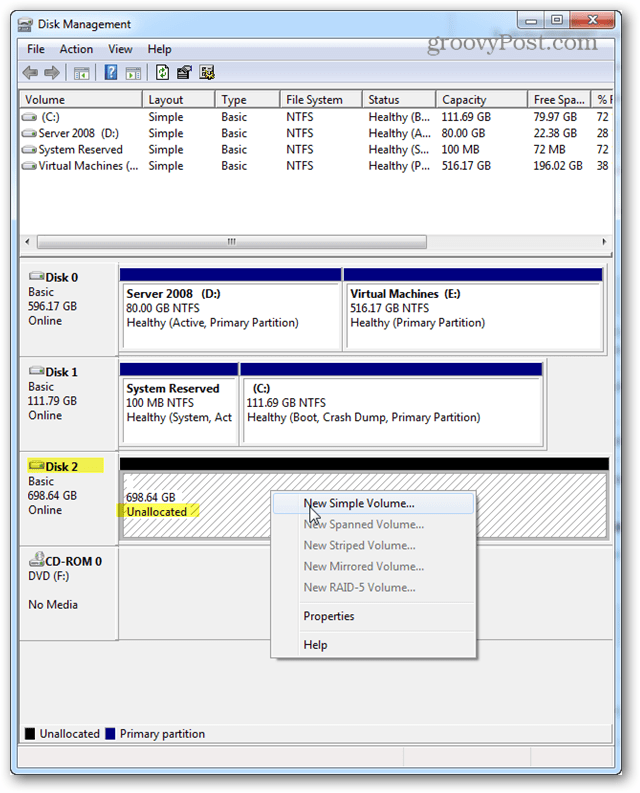
Now scroll down the page to the empty disk. It should have lines going through its space and labeled as “Unallocated.” Right-click the striped area and select “New Simple Volume….”
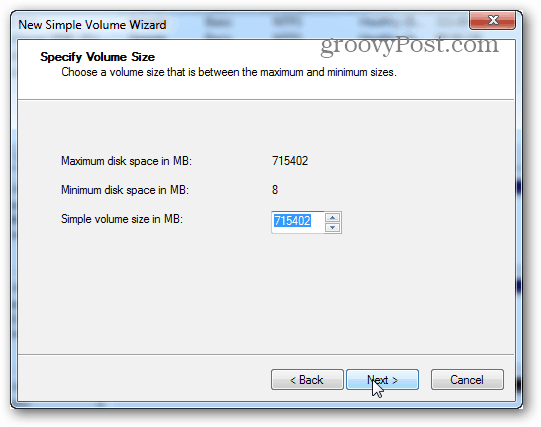
For Volume size, it should probably be left at whatever Windows set as the default, which should be the Maximum available disk space listed just above it. Click Next.
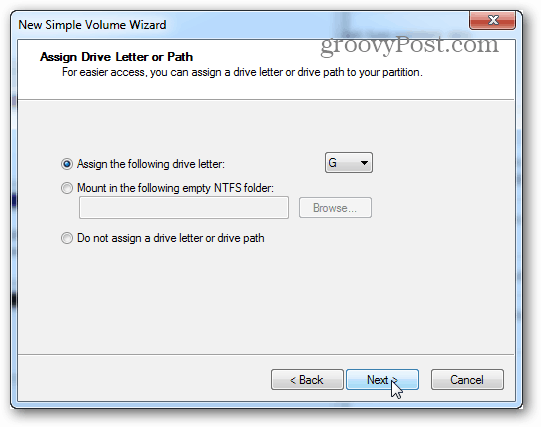
The drive letter can be whatever letter you feel like using. I used G. Click Next.
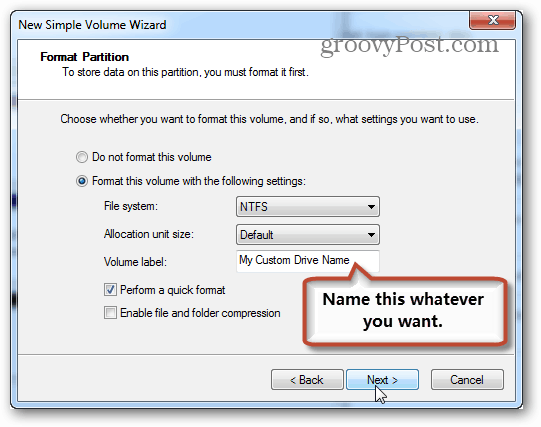
Now for the format screen, the default is NTFS, and it should be left there unless you’re planning something special for the drive. The same goes for allocation unit size. The volume label is the drive name and can be whatever you want. Set it to “perform a quick format” and click Next.
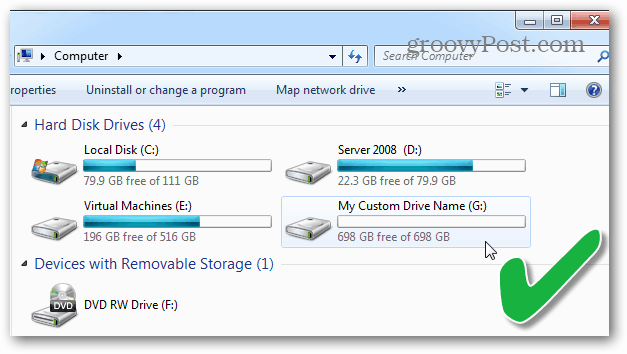
Once the format is done, the drive should show up in Windows Explorer and is ready for you to start saving things to it. All done!
Help my Computer Won’t Start After Installing the New HDD / SSD!
Did you just finish installing the new drive, and now the computer won’t turn on? Is it not even showing a bios screen or responding to the reset button? This is actually a fairly common issue, which is easy to fix if you’re lucky.
Check all the SATA cables and make sure they are secure. If one is too loose or not correctly attached, the computer won’t even POST the bios check. I actually had this happen to me the first time I put the SATA cables in. Cable management can be important!You may need to replace a SATA cable. Don’t worry; they’re cheap.In the worst-case scenario, something in your motherboard is broken. As long as you were careful, this is unlikely if the MB was recently working before you tried installing a new drive.
If you have any comments or questions, please leave them below, and the groovy team & community will be happy to answer them! Comment Name * Email *
Δ Save my name and email and send me emails as new comments are made to this post.


![]()
