You can customize the Lock Screen to suit your own requirements—for example, you may decide to change the wallpaper. Still, some users might not care to click through the Lock Screen to get into their system. If that’s the case, you’ll want to disable the Lock Screen on Windows 11. To disable it, you can use either the Group Policy Editor or you can modify the Registry. However, these options are only available to certain Windows 11 versions (unless you decide to upgrade). If you want to know how to disable the Windows 11 Lock Screen, follow these steps.
How to Disable the Lock Screen on Windows 11 via Group Policy
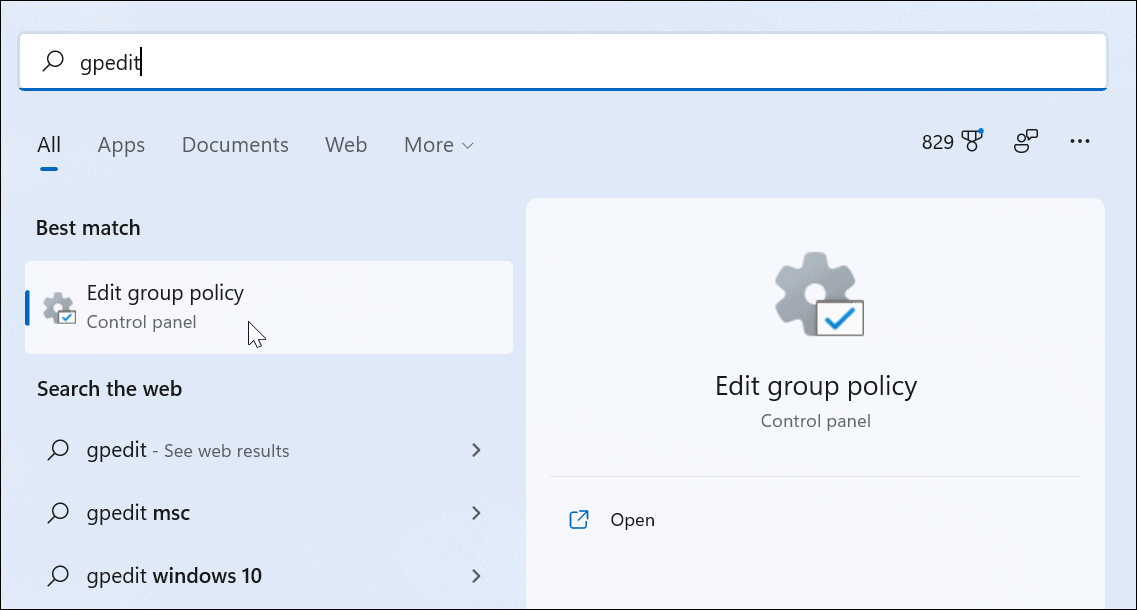
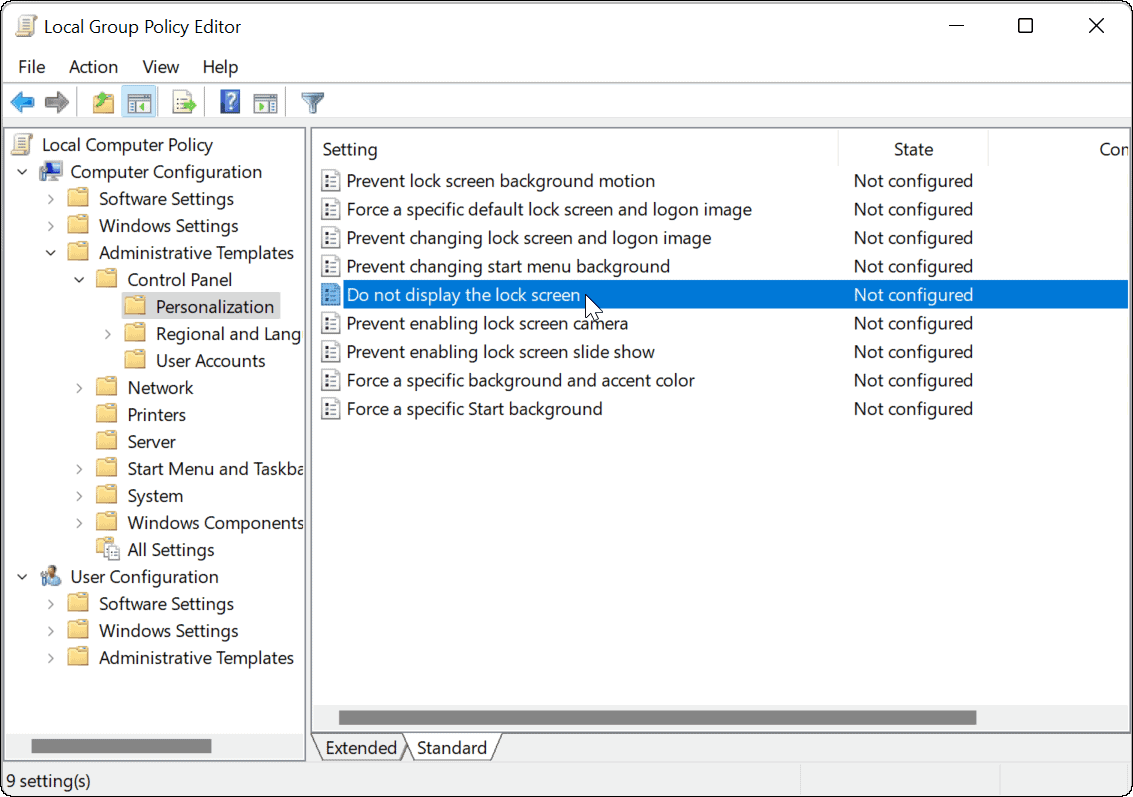
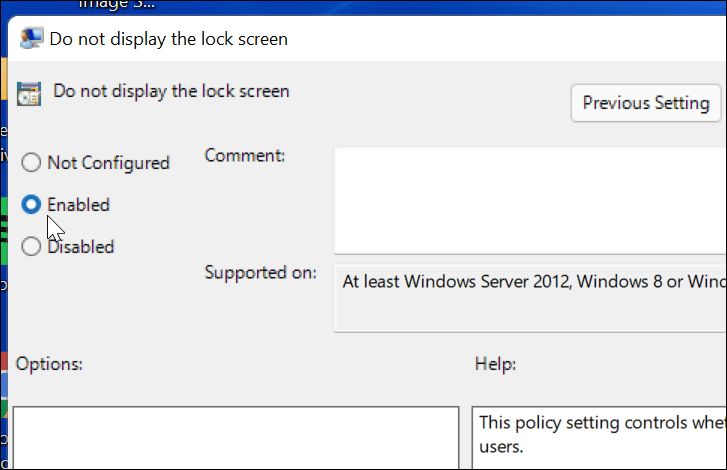
First, we’ll look at disabling the Lock Screen via Group Policy using the following steps:
When the computer restarts, it will go directly to the Sign-in screen, and the Lock Screen will no longer display. Again, this works on Windows 11 Pro (or above) only.
How to Disable the Lock Screen via the Registry on Windows 11
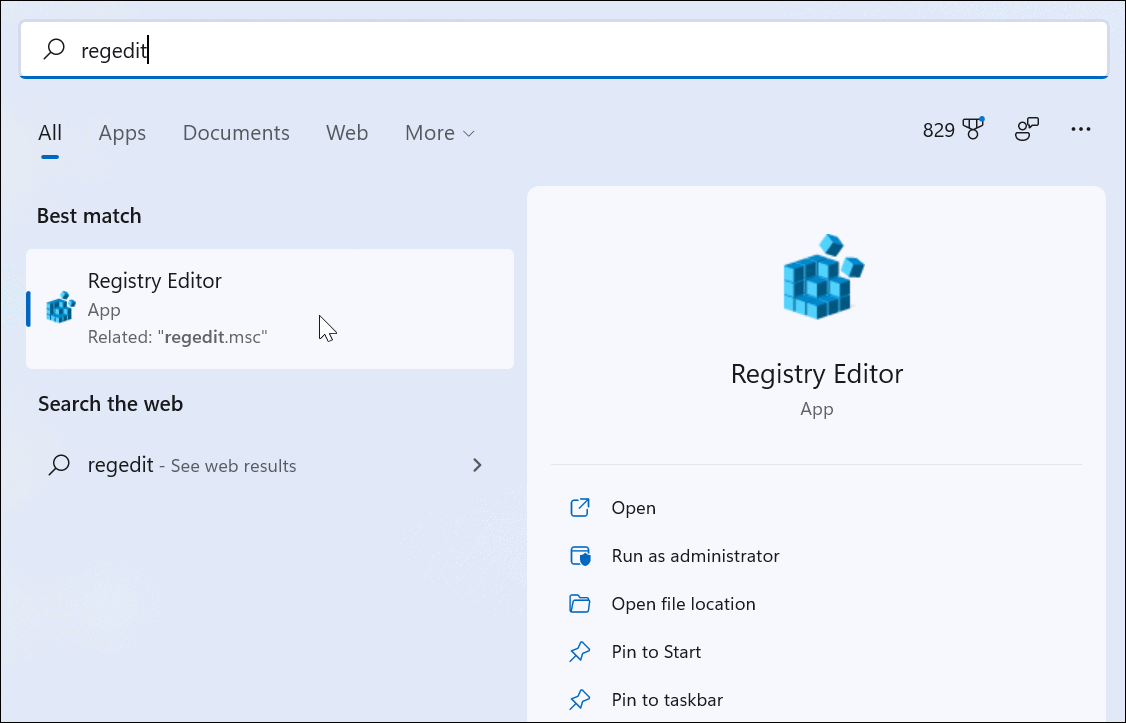
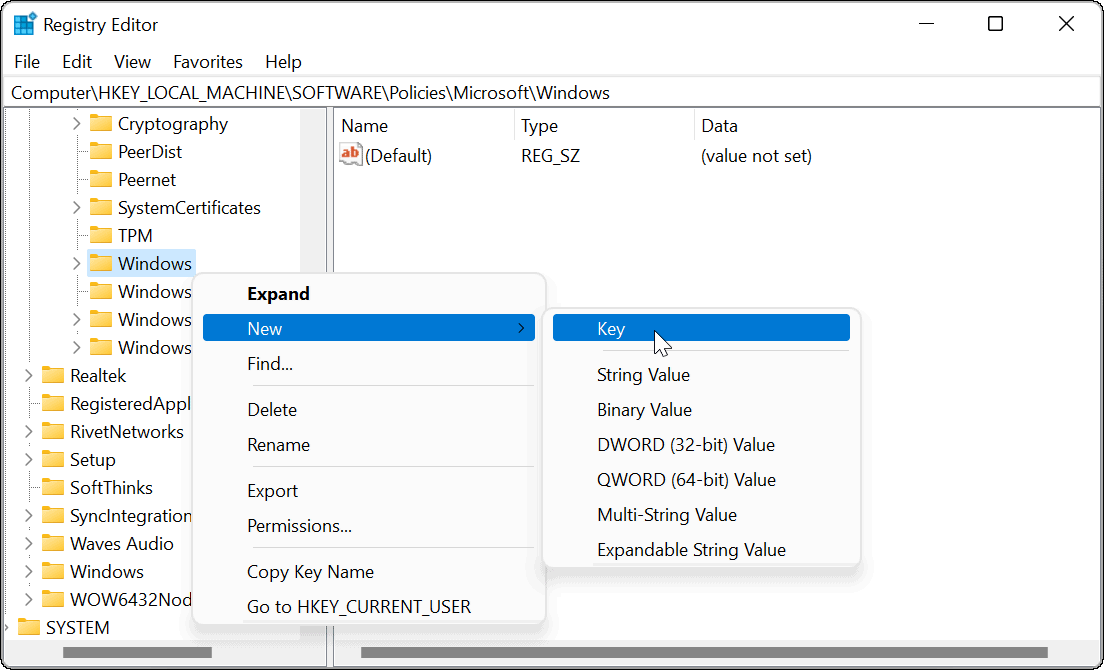
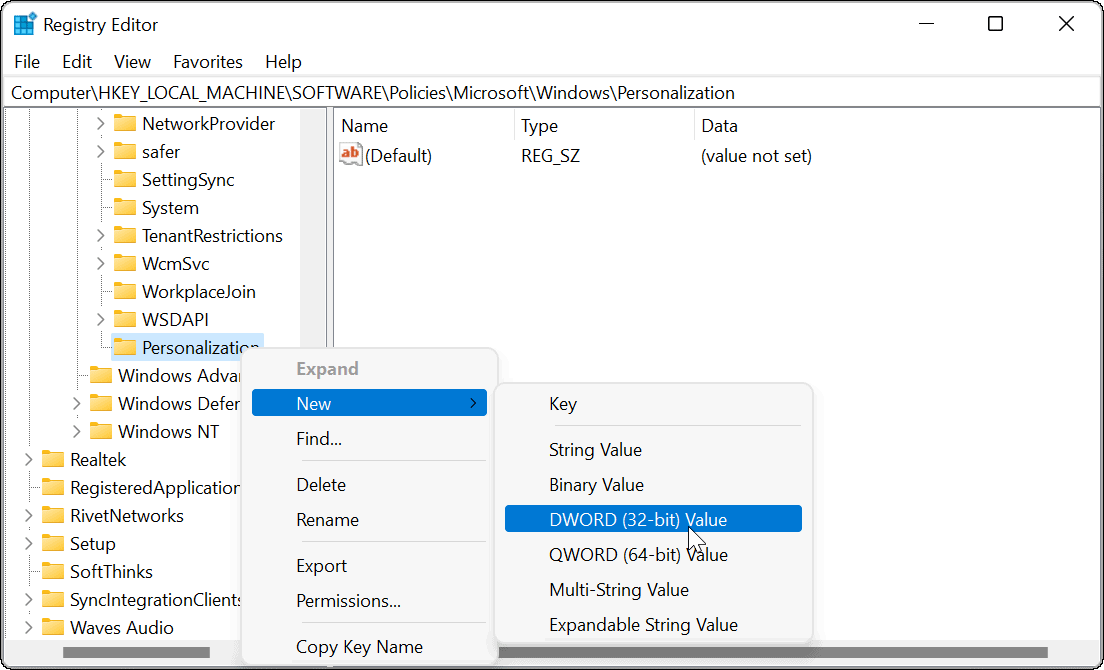
If you’re running Windows 11 Pro, Education, or Business, you can also disable the Lock Screen by modifying the Registry. To disable the Lock Screen using the Registry on Windows 11, do the following:
Exit the Registry Editor and restart the PC when you’re ready. If you followed the steps correctly when your computer boots up again, the Lock Screen will be skipped, and you’ll see the sign-in screen only.
Customizing Windows 11 Further
The steps above should help you to disable the Lock Screen on Windows 11, but there are other ways you can customize your new PC. For example, another way to quickly bypass the Lock Screen is to set up Windows Hello. The screen still appears, but when facial recognition detects your face, it will bypass the Lock Screen and sign you in within seconds. To customize Windows 11 further, you can also change your desktop wallpaper or move the Start button to the left. Comment Name * Email *
Δ Save my name and email and send me emails as new comments are made to this post.
![]()

